[HOW TO] DIY KEYBOARD - PART 7: CONFIGURATION AND PROGRAMMING
05/2020 par HOLGER DASSLER/SEBASTIAN VREE - Retour à l'aperçu

Before your DIY keyboard can be used, you need to configure and program it. This ensures that the keyboard works in your chosen country layout and on every PC. How you do this exactly and what considerations you have to keep in mind is what we’ll show you in this part of our DIY series.
After your custom keyboard is fully assembled, all you need to do is configure the controller. This ultimately enables the keyboard to process inputs and pass them on to a PC. This requires the generation and installation of a firmware. How to create such a firmware and how to configure the keys correctly is the topic of this last article in our DIY videos series.
SETTING UP THE FIRMWARE
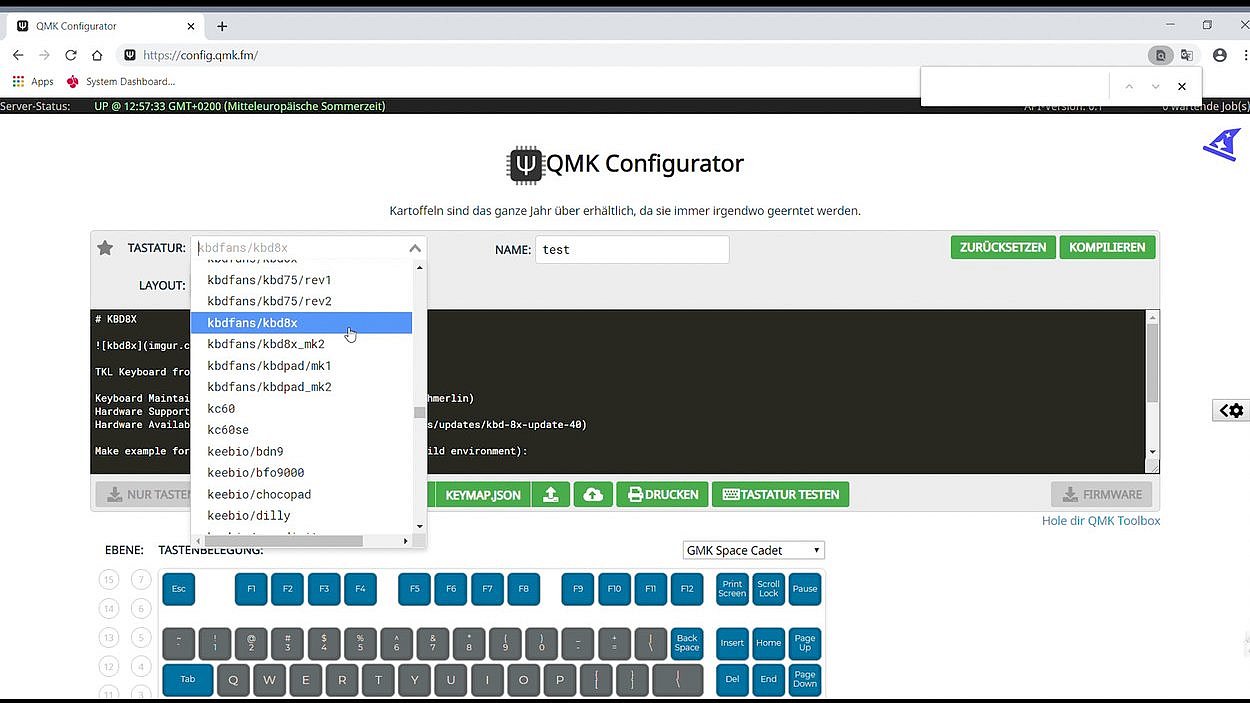
To create the firmware for your DIY keyboard, you must first launch the QMK online configurator at https://config.qmk.fm/. We recommend using Google Chrome or Mozilla Firefox, as problems may occur with Internet Explorer. Select the correct PCB in the configurator; in our example, it's "kbd8x" for the TKL keyboard of KBDFans. Then you should give your firmware an (preferably unique) name.
KEY CONFIGURATION AND FIRMWARE DOWNLOAD
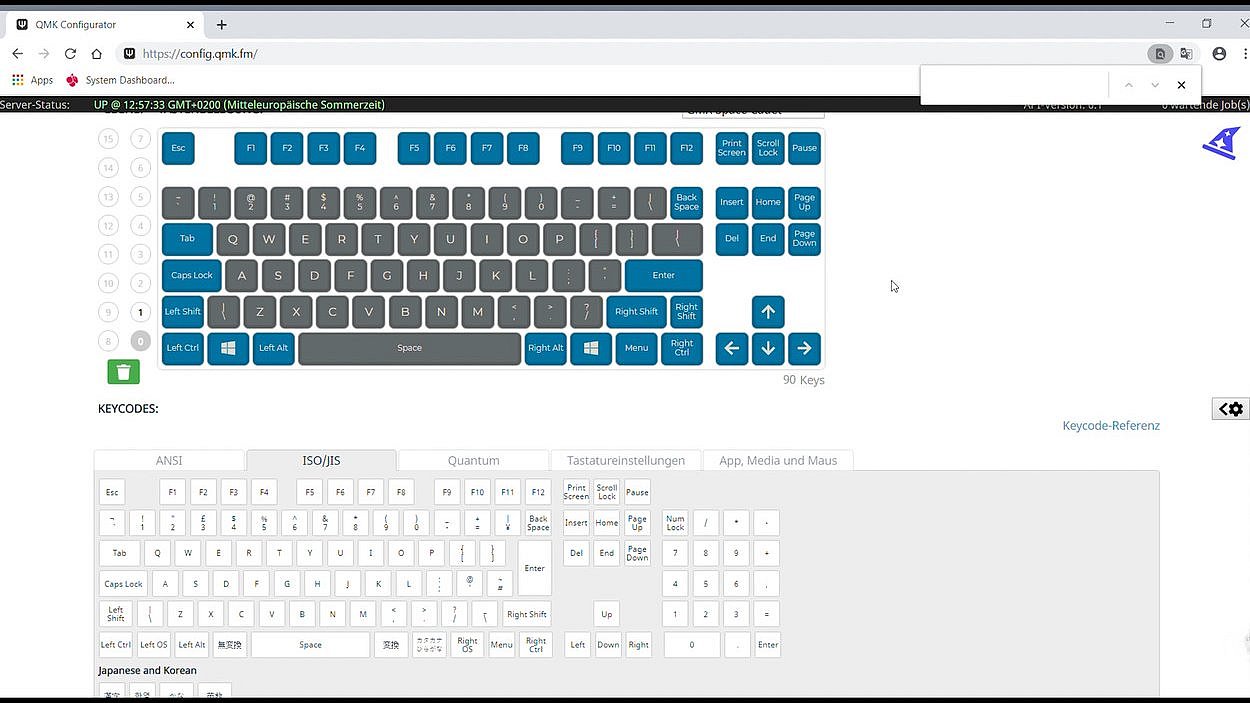
Now you need to configure the individual keys and define the corresponding country layout. There are two possibilities for this: either click on the corresponding key in the configurator and then press it on the keyboard, or drag and drop the respective keys from the selection graphic into the empty fields. Once the key programming is complete, the firmware can be generated by clicking the "Compile" button. Once the file is generated, it is available for download.
DRIVER INSTALLATION
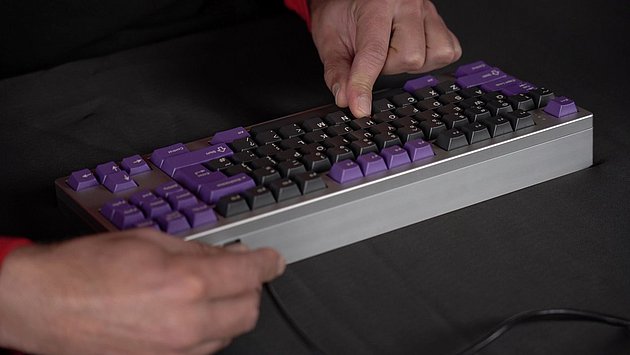
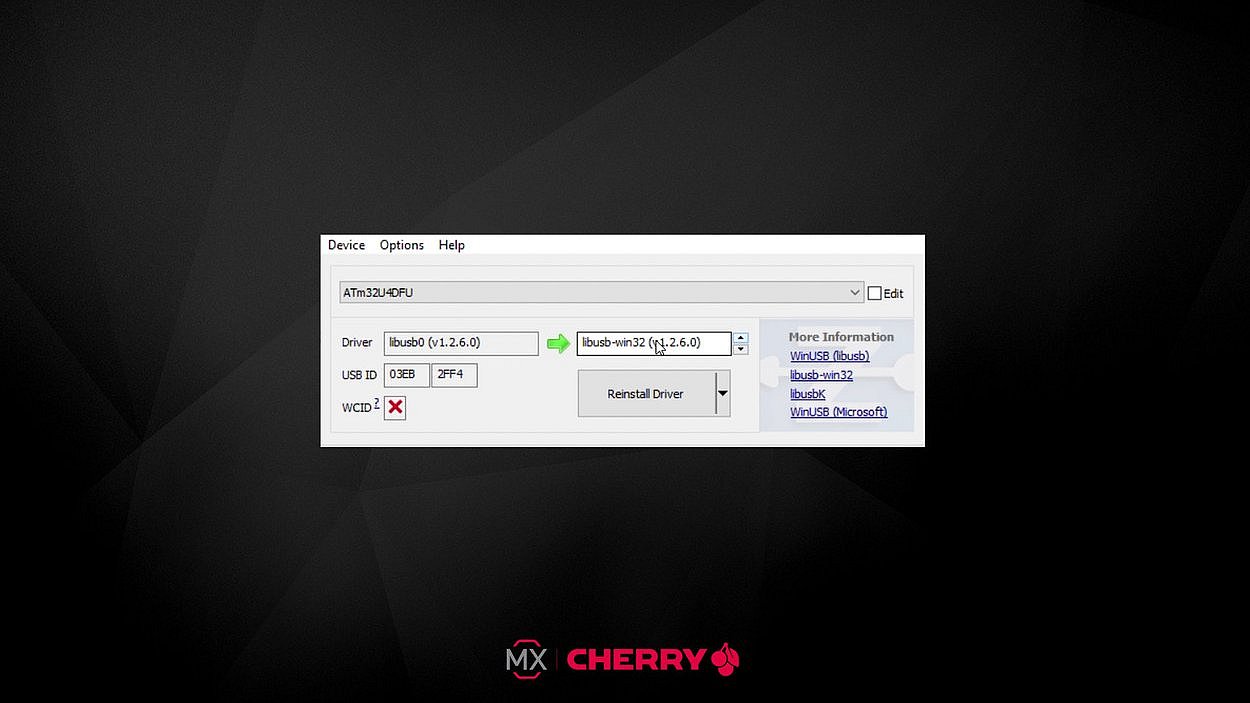
In order to install the firmware on the keyboard controller, you will need to download the latest version of the "Zadig" software: zadig.akeo.ie. The bootloader mode of the keyboard has to be activated to install the driver with the help of Zadig. There are two ways to do this: either through pressing a key combination, or by pressing a button on the PCB.
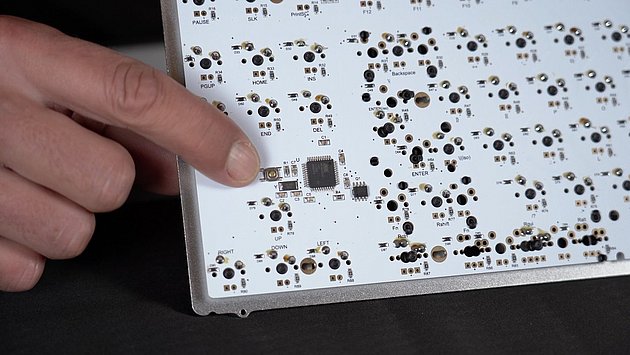
In the case of our PCB, the Space bar and the "B" key must be pressed simultaneously while connecting the USB cable to the keyboard. Make sure that the other end is already connected to the PC. If this variant does not work and there is no bootloader button opening at the bottom of the keyboard housing, you have to remove the PCB from the case and press a small button at the back to activate the bootloader mode.
If you are in bootloader mode, Zadig will detect the keyboard controller and suggest a driver. You only have to select the driver from the drop-down menu and install it. If the controller is not detected automatically, you have to select it manually via "Options" and then "List All Devices".
FLASHING THE FIRMWARE
The final step is to write the firmware to the keyboard controller. This requires the QMK-Toolbox, which is available for download at https://bit.ly/toolbox_qmk. After opening this tool the keyboard should be recognized automatically, with a yellow command line confirming the connection.
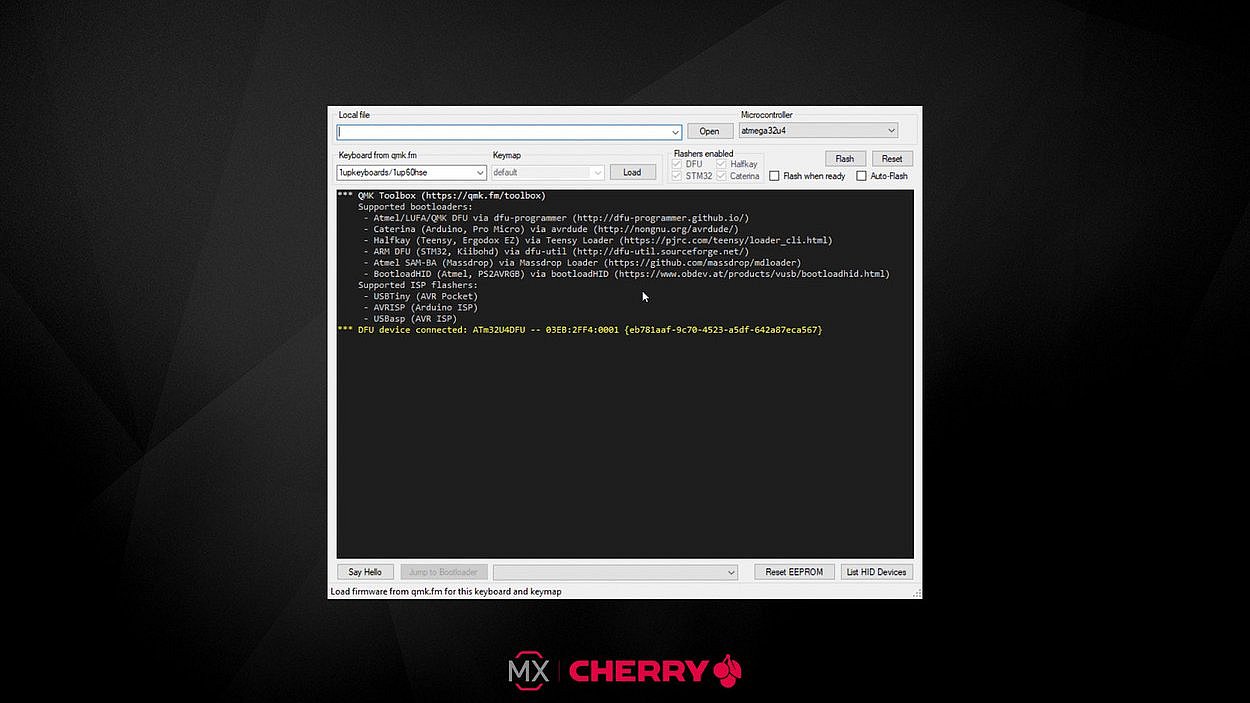

Now, select the correct firmware file (with extension “.hex”) with the "Open” button, select the correct controller (in our case ATm32U4DFU) and click on the "Flash" button. Afterwards, you can test your key configuration with the test function in the online configurator or a keyboard tester. If everything is recognized correctly, your custom DIY keyboard is ready for use!
If everything is recognized correctly, your custom DIY keyboard is ready for use!
We would like to thank GMK and CandyKeys once again for their support with this DIY project.